Photos of stars can be pretty cool; even with clear nights being a rarity in Britain, I try to take them as often as I can. A common misconception is that without a DSLR that you’ve had to remortgage your house to afford – there is no way of even thinking about taking a photo in the pitch dark. The beauty of star photos, however, is that you only need a camera with full manual control to get some very impressive results.
The premise of a star photo is that, rather than relying on the sensitivity of the camera’s sensor to amplify the natural light in the sky, you simply increase the length of time that a photo is being taken for (long exposure) to increase the light in an image – you therefore need a tripod, steady surface or super human powers to keep the camera still enough for the length of time needed.
How to actually do it:
It would be a lie if I said that there was a tried and tested formula for capturing a star photo, there is an element of trial and error required concerning the actual settings – there are however a few general rules to follow:
- Place your camera on a tripod
- Use the lowest aperture on your lens
- Use a wide angle lens
- Use manual focus and set to infinity, then pull back slightly
- Switch on long exposure noise reduction (if your camera has this option)
- Start with ISO 1600
- Start with a 8 second long exposure
The bottom two points are most important to consider here, ideally you want to use the lowest ISO possible with a very long exposure to counter. However as the exposure time begins to increase, due to the movement of the Earth, the stars begin to leave light trails which may not be appealing for your image. This effect is further worsened with a long focal length – so in order to retain the natural look of the sky, use a wide angle.
The trial and error comes in with your ISO and shutter speed. The settings above seem to work most times for me with an F1.8 lens- just play around with different combinations and see what gives you the best results. You have to be very careful, however, when raising the ISO – when doing this the sensitivity of all light is increased. Therefore, while increasing the brightness of the sky, you dramatically increase the brightness of anything else in your photo that already has some light on it. This means that when you include anything which isn’t the sky in your image it must be very dark or else it will become unappealingly bright with the high ISO. An example of this can be seen below.
Some examples:

This photo renders the sky very well, with an exposure time of 10 seconds. However, with the buildings and ground being lit in real life, an ISO of 1600 completely blows the highlights.

This photo was taken over 8 seconds with an ISO of 3200. The whole image is well exposed, however my choice of such a high ISO has made the picture very noisy. In this case, a longer exposure and lower ISO would have been better.
Raw or JPEG?
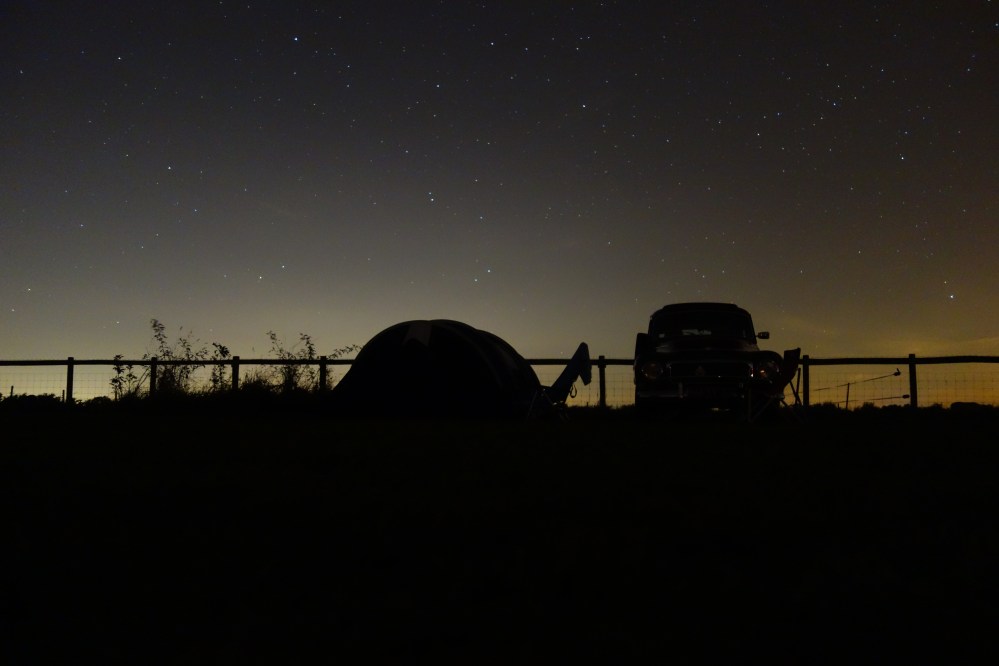
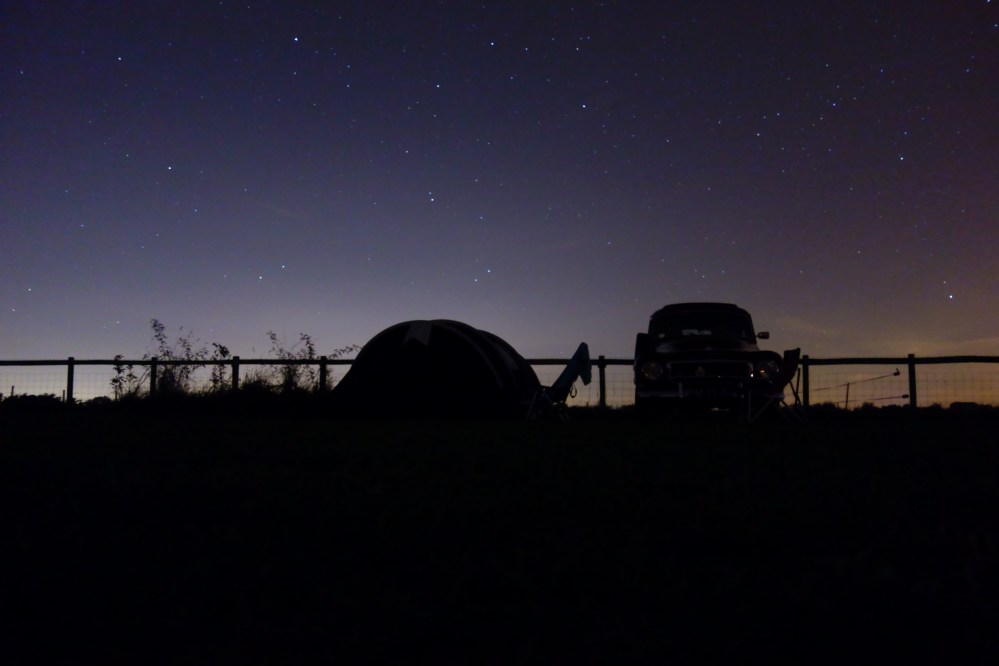
Now the age old question of whether to shoot in raw or JPEG format; in this situation I’d highly recommend choosing the option to shoot both. For example, you may be content with the JPEG that the camera has produced – leaving out the hassle of adding noise reduction or changing other settings afterwards. However, at night it is very unpredictable how a photo will turn out. The first photo in this blog is just the in camera JPEG, however, with little colour point of reference for the camera to work with at night time, it has turned out quite warm. With all information being stored in the raw file I am able to change the white balance and noise reduction:
All the photos above were taken on a Mk1 Sony RX100. If you are seriously interested in night photography, i’d suggest a Sony A7sii – more camera information coming next week in the start of a “How to use your camera” series.
Nicholas Joinson.
