If you want a great mirrorless video camera, do not buy the Fujifilm XT2. Instead, within the price range of the XT2, buy either the Panasonic GH5 or the Sony A6500. If you bought the Fujifilm XT2 because it is a far better stills camera to the two suggestions above, in this blog post I’m going to tell you how to get 85% of the video quality of a camera like the GH5 by altering settings during filming and post production with the Fujifilm XT2.
Why does the Fujifilm have great potential to be a good video camera? There are a few essentials that a video camera must have, in my opinion, to make it have the best possible quality:
Assets the Fujfilm XT2 does have for video:
- 4K video recording
- A high enough recording bitrate (100 mbps)
- No moire/ alliasing
- Passable rolling shutter
- Extremely sharp video (4K downsampled from 6K)
Assets the fujfilm XT2 does not have for video:
- Internal log recording
Yes, that is genuinely my only complaint when it comes to the camera’s video recording capabilities, and thankfully it’s a feature that can somewhat be compensated for. As far as I’m concerned, trying to replicate the video you get from extremely expensive movie cameras is my goal when filming. While there are thousands of differences between my portable mirrorless camera and an Arri Alexa film camera, for me it’s dynamic range and colour that gives footage from movie cameras such a pleasing look, and these are the two things that I’ve been trying to improve with my Fujifilm XT2. The first stage in doing this is by faking a log profile with in camera settings. If you are not familiar with log video, it’s a picture profile found in some cameras which decreases the contrast and saturation of the captured video dramatically so that you can choose after you film where the contrast in the video should lie. When shooting in non log, the look of the footage is “baked in”- the black parts (shadows) will always be black and the brightest parts of the frame will always be bright. With log video, you can alter the exposure and colour of video with far greater freedom (much like raw photographs).
An example:
This is a simulated log video frame (you can see it is almost black and white with very little contrast):
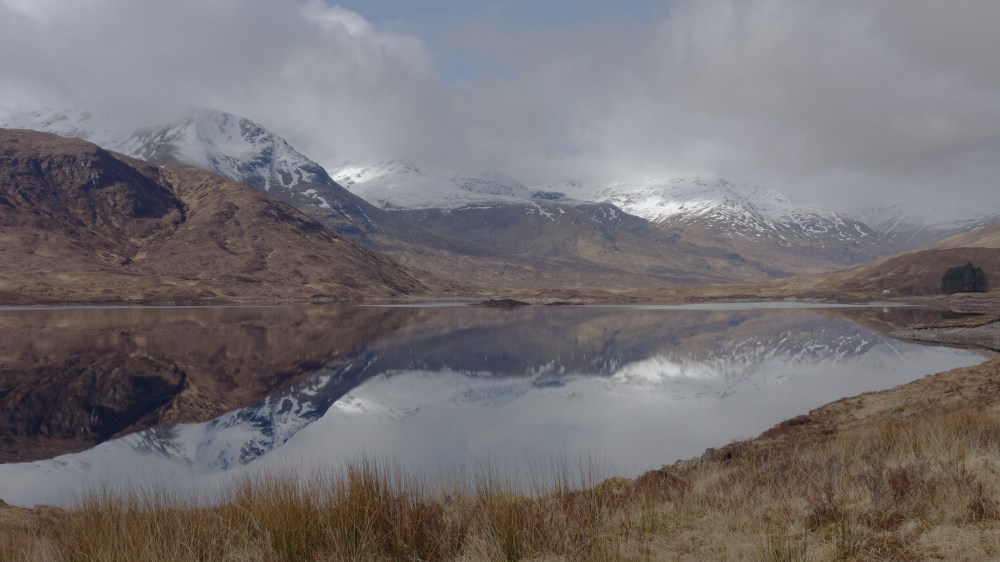
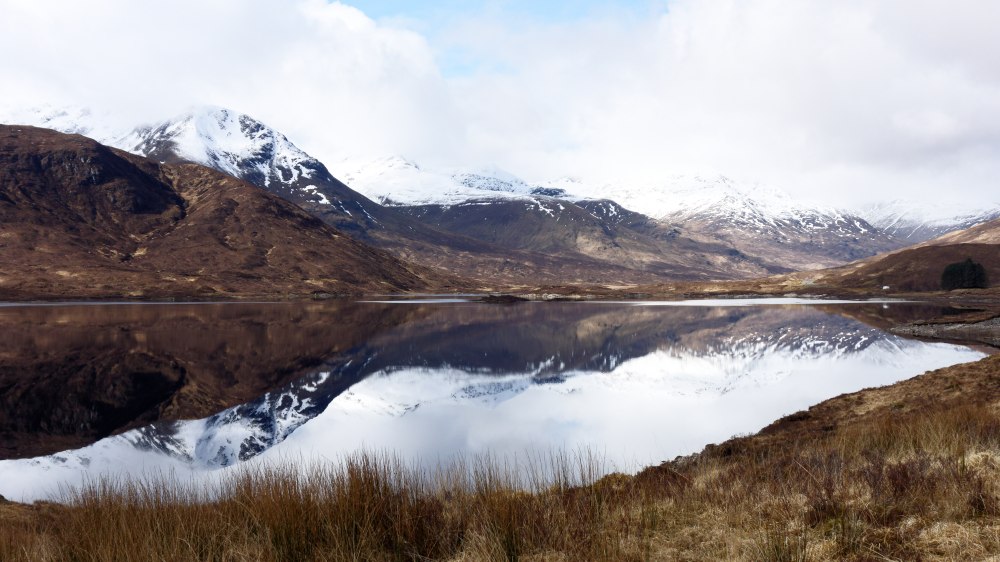
Now in editing I have been able to add lots of contrast, especially increasing the brightness of the mountains:
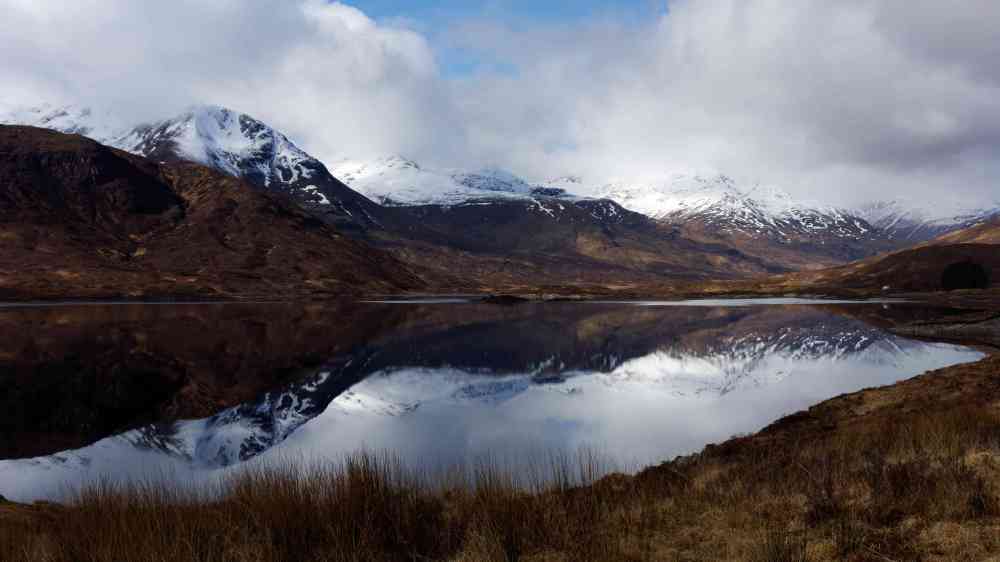
Now, here is the non-log (straight out of camera) video frame:
And here it is edited to look like the edited log frame:
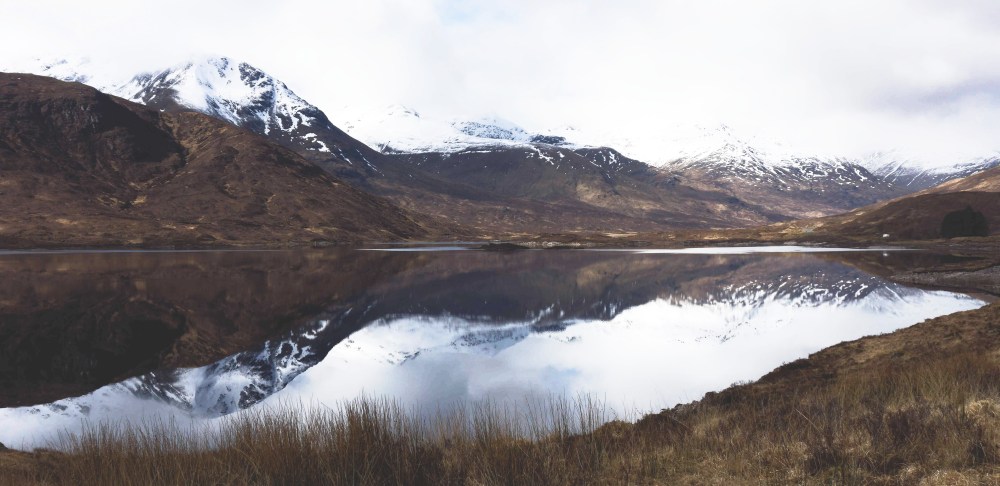
Because there is so little information in the shadows and highlights of the image, when trying to increase the brightness of the shadows to replicate the desired image, all that is being done is increasing black level threshold – not actually recovering information from the shadows but just making the shadows appear greyed out.
So, now you know the benefits of log video, how can you replicate it with an XT2? Here I’m going to show you how to make a custom setting you can access in the quick menu which has a particularly flat picture profile.
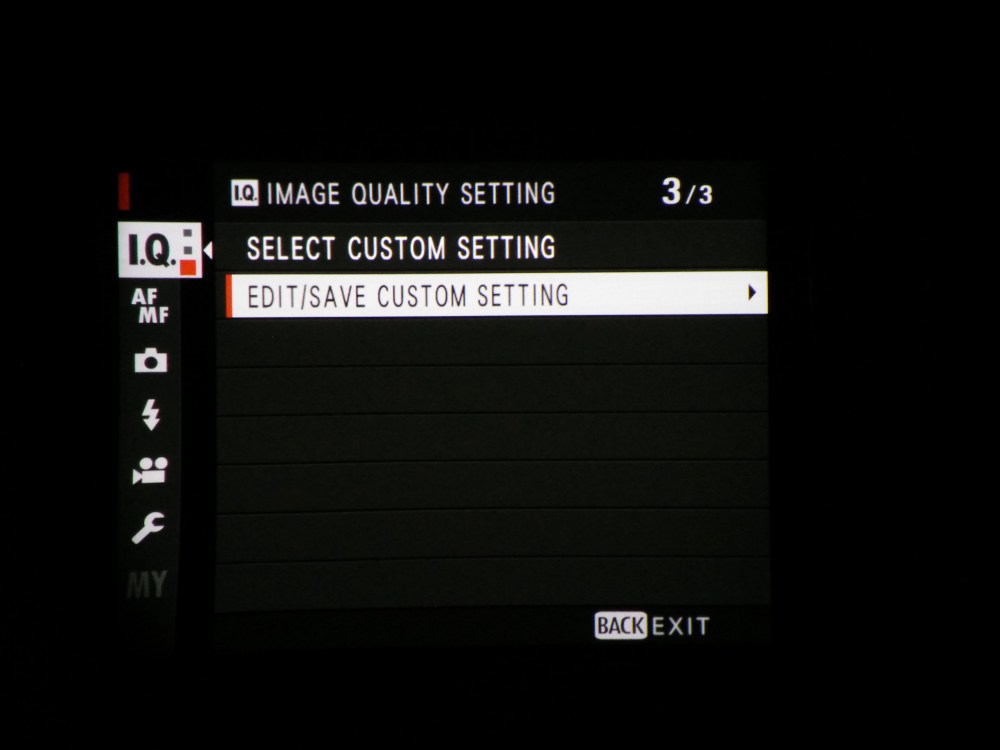
1) Press the menu button and on the IQ page scroll down to page 3. Now click on the highlighted option.
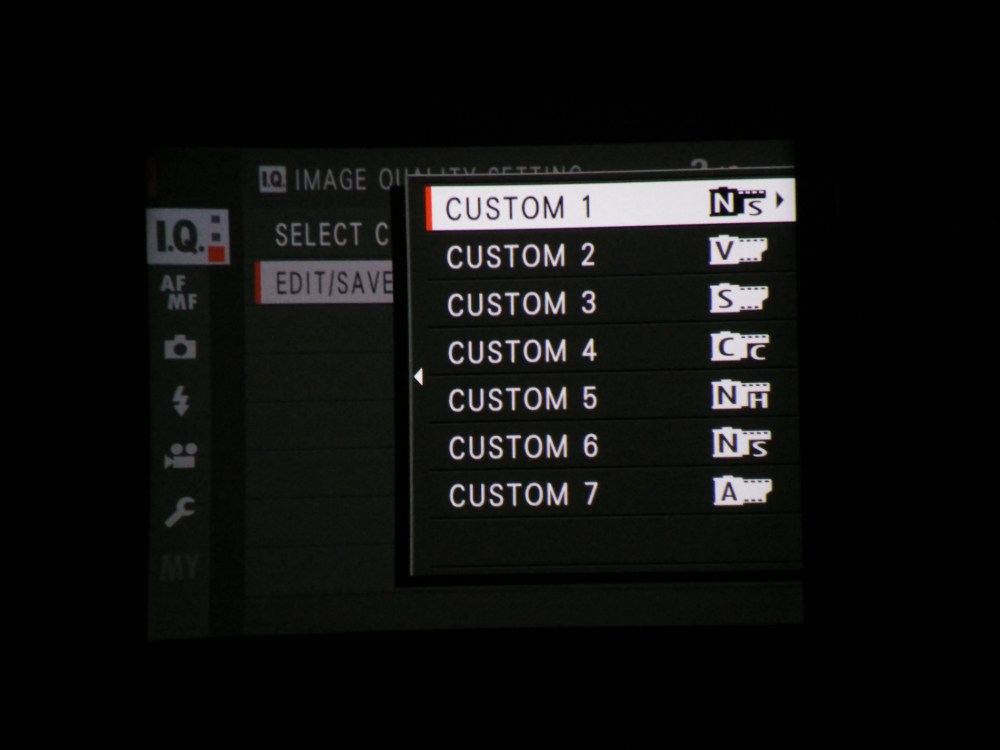
2) Now choose a quick menu page to edit the settings of. I chose “Custom 1”
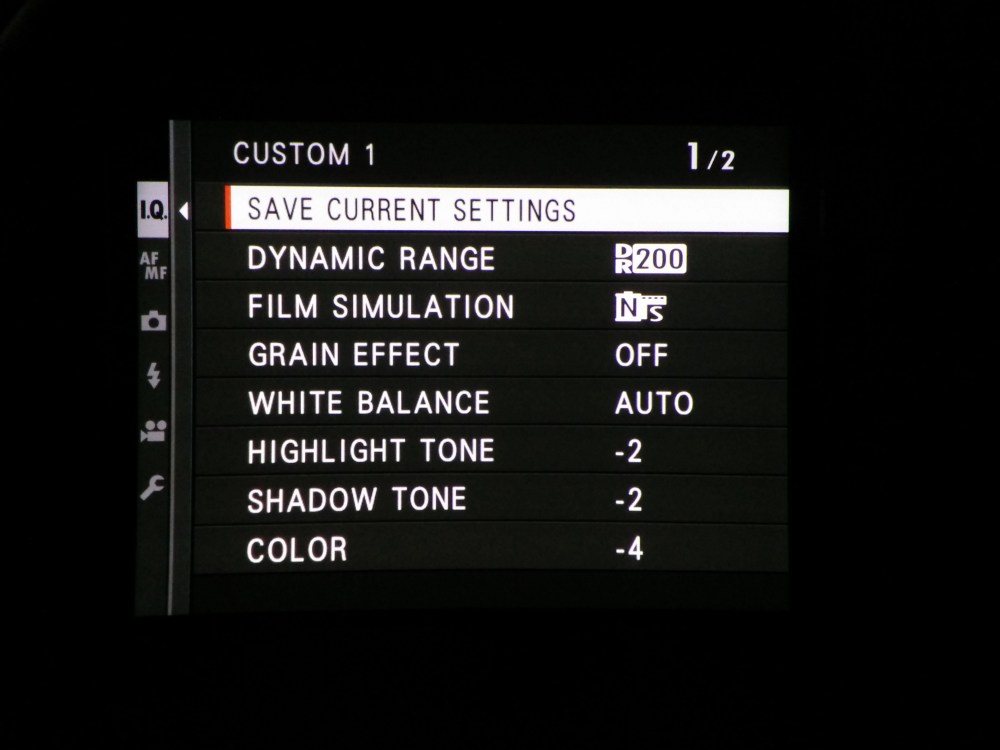
3) After that, change the settings to correspond to the ones I have here (note, the dynamic range setting does not apply in video mode). Changing to the Pro Negative Standard film simulation setting gives the image decreased contrast and reducing the highlights, shadows and colour to their minimum setting means that the image will even more closely resemble log footage. Sometimes I just use the standard film simulation depending on how much effort I want to put in grading the footage.
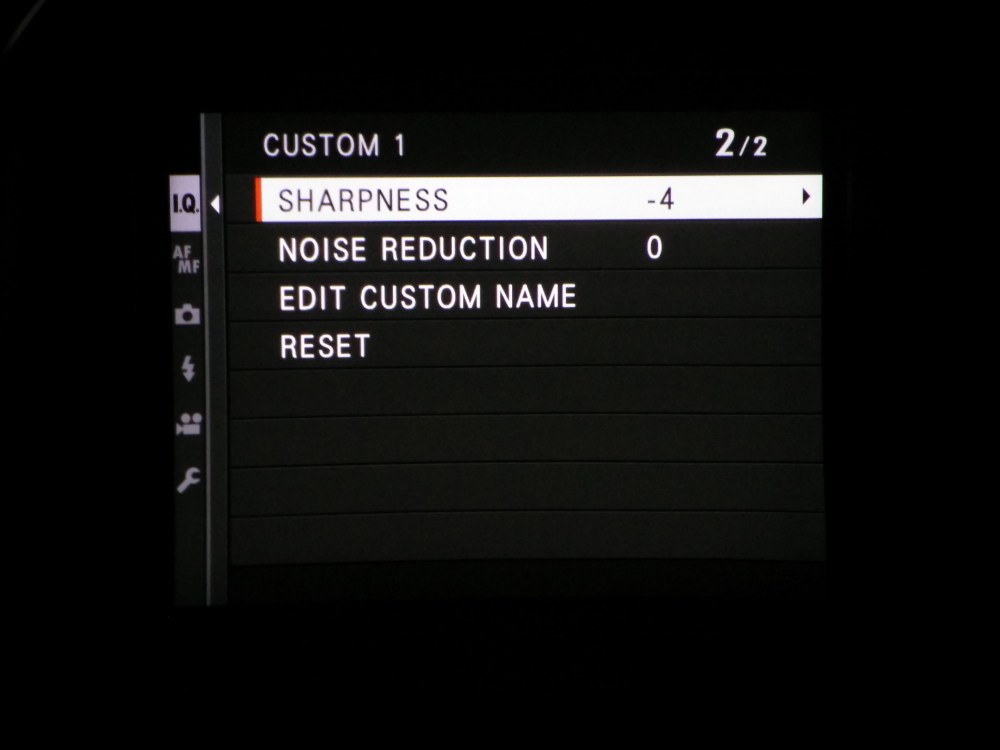
4) On the second page, turning down the sharpness to -4 is a good idea. Firstly, in camera sharpening is always awful and is easily added in post to a much higher quality. Secondly, the over sharpened video that is usually captured on consumer cameras more resembles cheap T.V breakfast shows than a high production budget film, therefore decreasing the sharpness gives the video a far more filmic appearance.
Tips for whilst you’re filming:
- As you probably know from photography, it is far easier to recover data from shadows than data from highlights. Therefore, it is a good idea to always beware of clipping highlights whilst filming as “blown out” highlights can be very distracting to watch.
- Always have your camera’s shutter speed set to double the frame rate number. This means that if the camera is filming at 30 fps, your shutter speed should be at 1/60th. You should be altering the ISO and aperture when you want to change the exposure
- If you are setting the camera up in position for an interview, for example, set the white balance manually. If the camera is set to auto white balance, it may change between shots meaning that the colours of two shots which you want to be identical, are not.
- Sometimes you do not need to use this custom profile we have put in the camera, if there is very low contrast or high contrast which you wish to keep in the final look of the video, just stick to one of the film simulations baked into the camera.
How to edit log video:
You need a video editing software that is able to do colour correction/ grading. I use Da Vinci Resolve but Final Cut Pro X and Premier Pro both have the facilities needed. While I am definitely not the correct person to learn colour correction/grading from, I know the very basics which I have been using to grade footage for a while now with some quite pleasing results. I’m afraid it’s not easy but it’s very rewarding once you get the hang of it. Here’s the tutorial I first learnt from:
After correction and grading, you may wish to add a small amount of sharpening in your editor to finish.
Recap:
- The Fujifilm XT2 has many things that could make it a great video camera, with the one large emission of in camera log recording
- Therefore, make a custom picture profile in the way explained to decrease the contrast and saturation of footage
- Edit the exposure and colours of this footage in post production in order to hopefully end up with footage which has increased dynamic range in comparison to the stock video settings.
- Don’t oversharpen footage, it will look awful
- Film in 4K at either 24 fps for a more filmic look or 30 fps for more TV looking footage
- Test out everything I have recommended here before using these settings for anything important, make sure you know exactly what you’re doing
If you have any questions I’d be delighted to answer them,
Nick.
